

Key Highlights
- A ridge vent is a crucial component for attic ventilation, promoting airflow and energy efficiency by allowing warm air to escape.
- Installing a ridge vent on your roof deck improves the health of your roofing system and prevents costly moisture damage.
- It requires essential tools like a chalk line, roofing nails, and materials such as cap shingles and wood sheathing.
- Proper alignment of intake vents and a ridge board is vital for effective ventilation and protection.
- Following safety precautions ensures a seamless installation process, helping extend the lifespan of your roofing system.
Let’s explore the installation steps in detail below!
Introduction
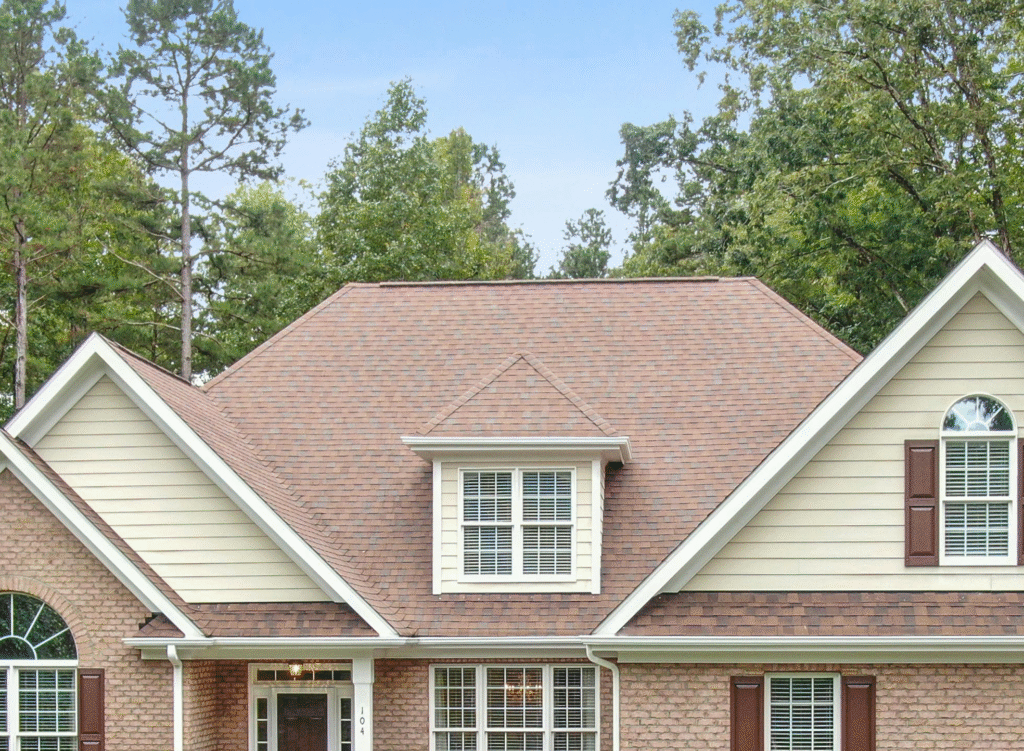
Proper ridge vent installation is key to having good ventilation in the attic and keeping your home’s energy efficiency high. The ridge vent sits at the top of the roof deck, so air keeps moving through. This helps stop moisture and heat from building up and protects the roof from damage. The system works well and is hard to see from the ground, so it also looks good on the home. No matter if you plan to do it yourself or get a pro, it’s important to know how the ridge vent installation process works. This can save you time and money. It can also help your roofing system last longer and work as it should.
Essential Tools and Materials for Ridge Vent Installation
Getting the right tools and materials is the first step if you want your ridge vent installation to be safe and work well. To get good results, you will need the right things—like a simple chalk line and a strong ridge board. It’s also very important to use safety gear, such as a harness, when you are working up high on the roof.
You should use good quality materials. This includes roofing nails which help your ridge vent last longer and make it more stable as you put it in. Take some time to prepare. With the best equipment and materials, your ridge vent will work the way it should and last for years to come. Let’s go over the exact tools needed for this project, so you can get started the right way.
Tools Needed for the Project
Having the right tools can make your ridge vent installation faster and safer. Here are the items you will need for any roofing job:
- Chalk Line: Use this so you can mark straight lines for cutting along the ridge.
- Circular Saw: This tool cuts the wood sheathing to open up space for the ridge vent.
- Utility Knife: This is good for trimming shingles and making small cuts where needed.
- Roofing Nails: You need these to hold down parts like the ridge vent and the cap shingles.
- Safety Gear (Gloves, Goggles, Harness): Use these to protect your hands, eyes, and body from falls or flying bits.
If you run into tough old shingles or hard-to-remove material, a pry bar can be useful, too. Safety and doing a careful job matter, so always follow the manufacturer instructions for your roofing system.
By getting all these tools ready, you make it easy to move on to the next steps. Soon, you will pick the right materials to make sure there is good sealing and full protection for your house.
Recommended Materials for a Proper Seal
To get the best results and a long-lasting ridge vent setup, you need to use good materials. Here are the items you should have to make sure there is a solid seal:
- Underlayment: This is a layer that helps stop water from getting under your shingles.
- Roofing Nails: These need to be the right size, so you can fix the vent without worry.
- Ridge Cap Shingles: These go on top and help cover the vent in a clean way.
- Wood Sheathing: This acts as support both when you install and after it’s done.
- Roofing Caulk: This helps you fill in the sides and keeps water from leaking in.
| Material | Purpose |
|---|---|
| Underlayment | Stops water and moisture from getting in. |
| Ridge Vent | Helps with ventilation and airflow. |
| Roofing Nails | Holds the shingles and ridge vents in place. |
| Caulk/Sealant | Fills the edges and gets rid of gaps. |
| Wood Sheathing | Gives the opening more strength. |
When you put all these materials together, you will have a roof that lasts longer and does better with energy efficiency. This is also the first step before starting your easy step.
Step-by-Step Process to Install a Roof Ridge Vent
Putting a ridge vent on your roof helps with better ventilation. It can also increase your energy efficiency at home. In this process, you have to take off the old cap shingles first. Then, you need to cut vent slots in the roof deck. Next, put the ridge vent on the roof deck and make sure it fits well. After that, finish the job by placing the remaining shingles back on top. Every step needs care, so the job gets done right and your roof stays strong.
It is important to use safety tools, like a harness, and watch out for any vents that do not line up right. These simple steps can keep you safe as you work. Use this guide to make each step easy, so you end up with solid, professional results at the end. The work starts by removing the old ridge cap shingles.
Removing Existing Ridge Cap Shingles
Start by taking off the cap shingles that run along the very top of your roof. Do this with care to keep all the other roofing material safe and sound.
Use a flat pry bar or a utility knife to loosen and lift up the shingles. Watch for nails because you need to pull them out slowly without messing up the ridge board under them. If the shingles are falling apart, throw them away the right way. If they are okay, you can put them back on later.
When you have removed the shingles, look at the roof deck. Make sure it has no dirt or broken spots. It is important to get the area ready before you cut slots for vents. Once you move the cap shingles out of the way, you need to work carefully for the next part. You will need to mark and cut the vent slot in the wood sheathing.
Cutting the Vent Slot and Placing the Ridge Vent
Precise cutting is important for the ridge vent installation. Start by marking the ridge line on both sides of the roof deck. You can use a chalk line to help you get a straight and clear mark.
With a circular saw, cut a slot about 1 to 2 inches wide right at the roof’s peak. Do not cut into the rafters or the ridge board. That can weaken the roof. Take away any waste material after you cut. This helps get the area ready for the vent.
Next, put the ridge vent over the opening. Make sure it matches the ridge line. Fasten it in place with roofing nails. Use sealant along the edges so you get a tight fit. This keeps water, dirt, and other things out. Good placement helps air come in through the intake vents and keeps rain or debris from entering. Finish off by putting on new ridge cap shingles for a clean look.
Conclusion
In the end, putting in a ridge vent is important if you want good airflow in the attic and a roof that lasts longer. When you follow the step-by-step guide given in this article, you can get the job done in the right way. This helps air to move to and from the attic and stops moisture from building up. Make sure you use the right tools and materials, and do not rush through the steps. Take your time to make it work well. It does not matter if you want to do the ridge vent installation by yourself or want to hire someone. Knowing about ventilation, ridge vent, and the steps will help you make the best choices for your roofing with your attic in mind. If you have any questions or need more help, you can always ask for expert advice.
Frequently Asked Questions
Can I install a ridge vent on my existing roof?
Yes, you can put a ridge vent on the roof you have now. First, you may need to take off the old cap shingles. Then, you cut a hole in the roof deck. To get good airflow in the attic, you should use intake vents with the ridge vent. Make sure you do not break or harm things next to the area, like the ridge board, as you work.
How long does it take to install a ridge vent?
A regular ridge vent installation will usually take about 3 to 5 hours. The time it takes will change based on the size of the roof and the shape it is in. You need to remove the cap shingles first. After that, cut slots along the ridge board. At the end, secure the ventilation unit in place. With the right tools and safety steps, you can get this done well and without problems.
Do ridge vents work with all roofing materials?
Ridge vents work well with most roofing materials, such as asphalt shingles and wood sheathing. Before you install vents, you should think about what kind of underlayment you use and make sure it matches. For special types of roofing, like metal roofs, it is best to choose tough vents that are made to stop water from getting in.
What are the main benefits of installing a ridge vent?
A ridge vent helps move air through the attic all the time. It lets warm air escape and stops moisture from building up. This can give you better energy efficiency and a cooler attic. It helps your roofing last longer and makes mold or mildew less likely. Adding attic ventilation is good for your home and makes it last longer, too.
When should I hire a professional for ridge vent installation?
If you do not have the right tools or you have no experience with ridge vent installation, it is best to hire a professional. The work calls for cutting the roof deck and making sure the intake vents are in the right place. It takes a careful hand and know-how. A pro can make sure the ridge vent is set up strong and steady. They will help protect your ridge board and make sure the vents and intake parts of your roof will work well for many years.