

Key Highlights
- Easily build your wood deck railing with this comprehensive DIY guide.
- Learn about essential tools, materials, and design considerations for a safe and stylish railing.
- Step-by-step instructions for setting up sturdy railing posts and assembling the framework.
- Enhance the aesthetics of your deck railing with staining, sealing, and decorative elements.
- Find answers to common questions like wood durability, railing height, customization, and maintenance.
Introduction
Building your own wood deck railing is an exciting journey that can greatly improve your outdoor space. You will get to pick the right materials and create a design that is both safe and stylish. Every step you take gets you closer to changing your deck into a beautiful area. By mixing creativity and care, you can make a railing that fits well with your home. It will also meet all the safety rules to ensure a nice and safe spot outside. Let’s look at the important tools and materials you’ll need for this fun DIY project.
Essential Tools and Materials for Your Wood Deck Railing Project
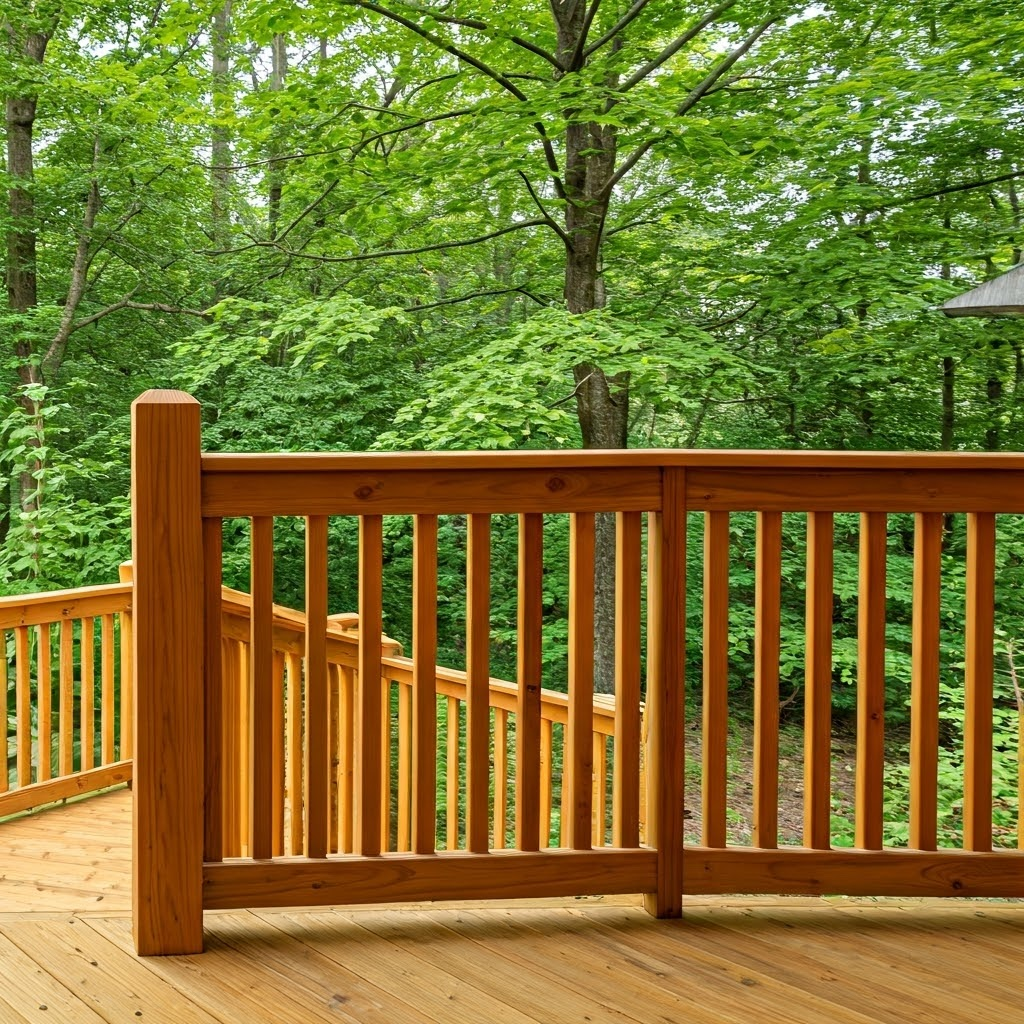
When working on your wood deck railing project, you will need some important tools and materials. These include structural wood screws, deck screws, metal brackets, and rail caps. Choose durable lumber, like cedar, to make sure it lasts a long time. You will also need some key tools. A chalk line, a deck framing square, and a plumb bob will help you get things accurate. It’s very important to meet local regulations about post spacing and railing height before starting your project. Keep in mind that these tools and materials are the base of a strong and good-looking deck railing.
Selecting the Right Wood and Materials
To create a strong wood deck railing, choose rot-resistant lumber like cedar. Make sure your materials follow local codes. Pick railing parts such as metal balusters or wooden pickets to add style and safety. Think about using structural wood screws for more strength. Select good quality top rail, bottom rail, and rail cap to complete the design. Use fasteners, like deck screws, to hold everything together securely. Focus on materials that can handle outdoor weather and also improve the look of your deck.
Tools You’ll Need to Get Started
To start your deck railing project, collect the tools you will need. Get deck screws, structural wood screws, and fasteners. Use a tape measure for accurate measurements. Also, have a level to make sure your installation is straight. A power drill will help you assemble quickly, and a saw is important for making accurate cuts. Don’t forget to wear safety gear like gloves and goggles to stay safe. These tools will make your job easier and help you build a strong and nice-looking deck railing. Happy building!
Designing Your Deck Railing for Safety and Style
When you make your wood deck railing, think about safety and how it looks. Start by planning how your railing will be set up. Pick a style that matches your home and follows local regulations. Make sure the post spacing is right for strong support. Use metal balusters to give it a modern feel. Choose a safe railing system with metal brackets and deck screws. You can improve the look by adding a rail cap. This will help with safety and make it look nice. By mixing safety with style, you will create a good-looking and safe deck railing.
Planning Your Railing Layout
To plan your railing layout well, first think about what you want it to look like. Look at the style of your deck and the area around it. Measure how long your railing needs to be, including the space between the posts. Make sure to check local codes for the required height and spacing. Plan the spacing between balusters to keep things safe and nice to look at. Use a chalk line to mark your layout clearly before you start installing it. Make sure your design is both useful and good looking.
Choosing a Railing Style That Complements Your Home
When picking a railing style for your deck, think about the design of your home. Classic wood railings suit traditional homes, while sleek metal railings are great for modern ones. Make sure the style you pick matches the look of your outdoor space. Also, keep in mind any local regulations that might say what railing styles you can use. Finding a good balance between safety, looks, and rules will help you choose a railing that adds beauty to your home.
Step-by-Step Guide to Building Your Deck Railing
To build your deck railing, first, set up the railing posts using structural wood screws. Make sure to place them at the right post spacing. Then, attach the top and bottom rails to the posts with deck screws to create the railing framework. Lastly, install balusters between the rails for safety and looks. Be sure these meet local regulations. Following this simple guide will help you make a strong and appealing wood deck railing for your outdoor space.
Setting Up Railing Posts Securely
To make strong deck railing, start by placing your railing posts based on local codes. Use a plumb line to keep them straight. Align them with the outer joists. Secure the posts with either structural wood screws or metal brackets to make them stable. Keep the right post spacing to avoid sagging later on. Check that the posts are at the correct height and are anchored well to the deck frame. Following these steps will help you build a safe and strong foundation for your deck railing project.
Assembling the Railing Framework
To put together the railing framework, start by fixing the bottom rail with structural wood screws. After that, attach the top rail to the railing posts using deck screws and metal brackets for better support. Keep the right spacing between the balusters following local codes to keep it safe. Use a level to ensure that the posts and rails are straight and secure. Lastly, make sure the railing lines up nicely with the deck surface for a neat final look.
Installing Balusters for Safety and Aesthetics
Installing balusters on your wood deck railing is important for safety and looks. Start by spacing them according to local codes, usually 4 to 6 inches apart. Use structural wood screws or metal brackets to secure them for stability. Make sure the balusters are plumb and lined up right to keep your deck looking good. You can choose metal balusters for a modern look or traditional wood pickets for a classic style. Balusters not only make your railing look better but also add important safety features.
Finishing Touches to Enhance Your Deck Railing
Staining and sealing your wood railing is great for making it last longer and look better. Adding post caps and decorative features can really upgrade the style and give a personal touch to your outdoor space. These small details help your railing match the overall design of your deck and make everything look neat. Think about the colors and style of your home to create a nice blend that boosts the charm of your outdoor area. You can try different finishes and accents to discover what works best with your deck.
Staining and Sealing Your Wood Railing
To keep your wood railing safe from outside factors, it is important to stain and seal it. Start by cleaning the surface well. This helps the stain stick evenly. Choose a good stain that matches your deck’s look and use a sealant to stop water damage. Apply the stain with a brush or roller, moving along the wood grain for the best finish. After it dries, add a coat of sealant for long-lasting beauty and protection. Taking care of your railing regularly will help it last longer.
Adding Post Caps and Decorative Elements
You can improve your wood deck railing by adding post caps and decorative features. Post caps give a nice finish and also protect the railing from weather. You can pick styles like pyramid or flat top caps based on what you like. Adding decorative items like solar lights or unique designs makes it feel more personal. Finding a good mix of function and decoration will make your deck look more attractive. Make sure to check any local regulations about height and design to stay safe and compliant.
Conclusion
After using this DIY guide to build your wood deck railing, you now have the skills and tools to make your outdoor space safer and more stylish. By choosing the right materials, planning for safety, and carefully following each step, your deck railing will meet and even exceed local regulations. Pay attention to details, follow spacing requirements, and use good fasteners to ensure your deck railing is strong and looks great. With your new skills, your deck will become a beautiful and safe oasis.
Frequently Asked Questions
What is the Most Durable Wood for Outdoor Railings?
When you choose outdoor railings, cedar and redwood are great options. They resist decay and insects naturally. You can also consider tropical hardwoods like ipe. These types of wood last a long time and need very little maintenance for your deck railing project.
How Tall Should My Deck Railing Be?
To meet safety rules, deck railings usually need to be at least 36 inches high. However, for better safety and looks, many homeowners prefer a railing height of 42 inches. Check your local building codes and think about what you like when deciding the height of your deck railing.
Can I Customize My Deck Railing Design?
You can customize your deck railing design. You can pick different types of wood, styles, and decorative elements that match your taste and home look. Think about mixing materials or adding special details for a unique touch.
How Often Should Wood Deck Railings Be Replaced or Maintained?
Wood deck railings need to be checked once a year. Look for any signs of wear, rot, or damage. Based on their condition, you might need to stain and seal them every 2-3 years. If the railings are no longer strong or regular care does not help, it’s best to replace them.
Are There Any Building Codes for Deck Railings I Should Be Aware Of?
Yes, there are rules about deck railings, and they can be different depending on where you are. It’s important to check with your local authorities to learn about the rules on railing height, how far apart the balusters should be, and what materials you can use. Following these rules helps keep everyone safe and ensures that your construction meets the standards.