

Key Highlights
- Enhanced Durability: Fiber cement siding is very strong. It resists rot, termites, and harsh weather. This means it lasts for many years.
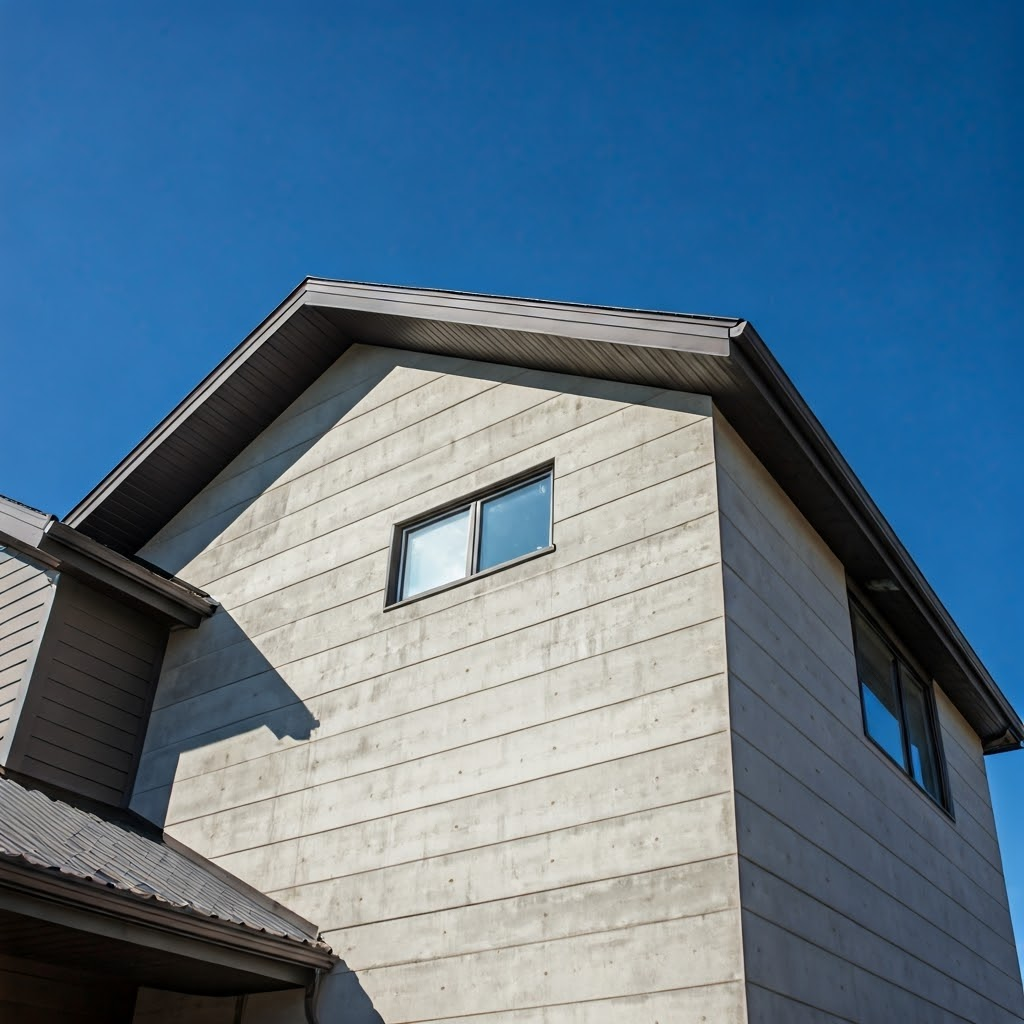
- Aesthetic Versatility: There are many different styles, colors, and textures of concrete siding. You can pick what looks best on your home’s outside.
- Low Maintenance Requirements: Fiber cement is really tough. This means you won’t need to spend a lot of time taking care of it. You can focus on other things instead.
- Boost Energy Savings: Concrete siding keeps your home insulated. This can help lower your energy bills.
- Fire-Resistant Composition: Fiber cement siding can resist fire. This enhances your home’s safety and protection.
Introduction
For homeowners who want to make their home’s exterior look stronger and more stylish, fiber cement siding is a good option. This guide will help you through the installation process step by step. You will learn where each piece of siding fits. You will also build the skills and confidence to achieve great results. We will cover the important tools and materials needed. You will get expert tips for installing and adding finishing touches. You will find out what you need to turn your ideas into a beautiful home.
Essential Tools and Materials for Concrete Siding Installation
Before you start putting up your concrete siding, collect all the tools and materials you need. Having everything ready will make the job easier. It will also help you feel prepared for each step.
Being ready like this helps you work better and leads to a successful installation. This allows you to concentrate on your skill in changing the appearance of your home’s outside.
Listing the Necessary Tools
To install concrete siding easily, you need the right tools. These tools are:
- Circular Saw: This tool is key for making precise cuts in fiber cement siding. It works best for longer pieces. Make sure to use a blade that is designed for cutting fiber cement.
- Fiber Cement Blade: A blade made specifically for fiber cement can cope with its weight. Using this blade with your circular saw will give you clean cuts and help your blade last longer.
- Nail Gun: A nail gun can make things go faster during installation. It is more accurate than using a hammer for nailing. If you use a nail gun, check that it is compatible with the screws and nail sizes you need for your siding.
- Hammer: Although a nail gun is quick, a hammer is still very handy. You will need it for driving nails and making small fixes.
- Level: A level is also important. You can use a regular spirit level or a laser level. It helps make sure that everything is straight and properly aligned, both sideways and up and down. Getting the level right is crucial for strong and good results.
Recommended Materials for Best Results
To ensure your concrete siding is installed properly and lasts a long time, it is important to choose the right materials. Using good-quality materials helps it perform well and reduces issues later on.
When you select fiber cement siding, James Hardie is a top brand that stands out for its quality. Their Hardie® Plank products are a favorite among many. We suggest you stick to their installation guidelines. This will help you get product recommendations and follow the best practices.
Always choose fasteners that can resist corrosion, such as stainless steel nails. This choice will stop rust and make your installation last longer. It is also important to use a good house wrap for better protection against moisture. When you paint, pick acrylic latex paint. It sticks well, lasts a long time, and can handle weather.
Pre-Installation Preparation
Before you put your concrete siding on, take some time to get your home’s outer walls ready. This step is key for a smooth and successful installation.
To prepare properly, you should protect your space from the weather, have a flat surface to work on, and organize your materials well. This will help you create a strong base for the installation. By being careful, you will improve the final look and make sure the installation is smooth.
Weatherproofing Your Home’s Exterior Walls
Creating a strong moisture barrier is a key step when putting on any siding, such as concrete siding. Proper weatherproofing protects your home from water damage, mold, and other moisture-related problems. This will help your investment last longer.
First, place a strong house wrap on the outside walls. Make sure to seal it tightly around windows, doors, and other openings. It’s important to overlap the seams of the house wrap. This will help make a good barrier against moisture.
You need to add flashing around windows, doors, and other weak spots, along with the house wrap. Flashing is usually made of metal. It helps to move water away from these areas. This extra step protects your home from water intrusion and prevents damage to the structure below.
Measuring and Planning for Material Requirements
Accurate measurements are important for a successful siding installation. They ensure you have enough materials and cut down on waste. Begin by measuring the height and width of each wall. This will help you calculate the total square footage.
When you are deciding how many pieces of siding to buy, consider the width of the siding panels and how much you want them to overlap. A “course” is a row of siding that stretches across. Many manufacturers recommend that you overlap at least 1 inch between rows. It is smart to read the manufacturer’s guidelines for the siding you are using.
To make installation easier, you may want to use a table like this. This can help you track your measurements:
| Wall Section | Height | Width | Square Footage | Siding Pieces Needed |
|---|---|---|---|---|
| Front Wall | 10 feet | 20 feet | 200 sq ft | |
| Left Side Wall | 10 feet | 15 feet | 150 sq ft | |
| Right Side Wall | 10 feet | 15 feet | 150 sq ft | |
| Back Wall | 10 feet | 20 feet | 200 sq ft | |
| Total | 40 feet | 70 feet | 700 sq ft |
The Installation Process Explained
Get your tools and materials ready. Now, you can begin the satisfying job of installing your concrete siding. If you follow these steps, you will achieve a great final look.
Don’t forget that practice makes you better. Before you work on the main walls, start with a less visible spot, like the back of the house. This way, you can practice your skills and feel more confident when you install the siding.
Starting with the First Course of Siding
The first row of siding is very important. It affects how the other rows will fit. Start by placing starter strips along the bottom of the wall. These strips should be installed 1 inch (2.5 cm) from the top edge of the siding. By lifting the first row of siding higher, this design helps water run off. It also stops moisture from moving up.
Next, use a chalk line to mark a straight line on the wall. This line will help you place the starter strips in the right spot. Nail the starter strips to the wall. Make sure the nails go into the wall studs.
Once you have the starter strips in place, you can begin to put on the first row of siding. Place the first panel so that its bottom edge is on the starter strip. Make sure the side edge lines up with the corner of the house.
Techniques for Efficient Siding Placement
When you put up lap siding, make sure each new row covers the row below it. This helps protect it from the weather. The overlap you use should match the type of siding you have. Always read the manufacturer’s instructions.
To stay organized when adding siding, vertical chalk lines are useful. You should draw these lines evenly spaced on the wall. Use your layout lines to help you.
When you put up the siding panels, pay attention to the windows, doors, and any other openings. Measure and mark these areas carefully. This helps you make accurate cuts and get a nice, professional finish.
Securing Siding Panels Properly
Using the right nailing techniques is important for putting concrete siding on the wall. This helps create a strong and weather-resistant fit. Pick fasteners made for fiber cement siding. Use nails that can resist rust and lessen exposure to silica dust.
When you install the siding panels, make sure to hit the center of the stud. The studs are the best spots to hold the siding in place. You can use a stud finder or check your layout marks to see where the studs are.
Be careful not to hit the nails too hard. If you do, it can crack the siding. The best position for the nail head is even with the surface of the siding. It should not go below the material.
Addressing Windows and Doors
Putting concrete siding around windows and doors needs close attention and care. A good seal will stop water from coming in and will make your home look better. By following the correct steps, you can also protect your home from damage caused by the weather.
Make sure you measure and cut carefully. Leave space for the siding to expand and shrink. Use caulking to completely seal every seam and joint.
Cutting and Fitting Siding Around Openings
Cutting fiber cement siding properly is important for a neat look. This is especially true around windows and doors. To get clean and accurate cuts, use a saw that has a blade meant for fiber cement siding.
A circular saw with a fiber cement blade is a handy tool. It helps you make straight cuts and angled cuts in siding panels. If you need to make smaller or more detailed cuts, a jigsaw with a carbide-grit blade is a better choice.
Before you cut, gain attention to measuring and marking the siding panel carefully. This allows you to make cuts that will fit the size of the window or door. Always take a moment to double-check your measurements before you begin cutting.
Ensuring Proper Gaps and Seals
Leaving enough space around windows and doors is important. This space allows the siding to expand and contract easily. It helps prevent the siding from bending or twisting when the temperature changes.
Caulking is very important. It makes a waterproof seal around doors and windows. This seal keeps water out and stops damage or rot. Choose a good quality caulk meant for outdoor use. Ensure it works well with fiber cement siding and stays flexible.
Remember to fill the top of the window and the sides of the window or door frame with caulk. Focus closely on the corners since that’s where gaps often appear. You can use a caulk tool or your finger to smooth the caulk. This will give you a clean, neat finish.
Finishing Touches for a Professional Look
After you put on the concrete siding, adding the final touches can make your work look great. Focusing on these details not only helps it look good but also keeps your investment safe for a long time.
Carefully sealing all gaps, adding trim for a clean look, and doing a complete check can help make sure the siding lasts and looks good.
Applying Caulk and Sealant Where Needed
Applying caulk and sealant is important for making your siding look nice and protecting it from the weather. These materials fill in gaps and joints, like end joints. They stop water from getting in and give a smooth finish.
Pick caulk and sealant made for outdoor use that works well with fiber cement siding. A high-quality sealant for siding will hold firmly, last a long time, and stand up to tough weather.
Before using caulk, make sure the surfaces are clean and dry. Then, grab a caulk gun and apply a steady line of caulk along the joints. After that, smooth it using a caulk tool or your finger. This will make it look neat and professional.
Final Inspection Checklist
Before you enjoy your siding work, take a moment for a final check. This step is key to ensure your concrete siding is installed correctly. A quick look will help you spot any small issues and ensure that your work is strong and can handle the weather.
Check the siding closely. Look for any loose panels, gaps, or panels that are not straight. Ensure that all nails are flat with the surface. Be sure no siding panels are touching the ground. This can lead to moisture problems.
Next, check the areas around windows, doors, and other openings. Make sure the flashing is installed correctly. Also, look at all seams and joints to ensure they have enough caulk. Good flashing and caulk are very important to stop water intrusion.
Conclusion
Installing concrete siding requires care and attention. You need to stay focused and use the right tools. Each step, from weatherproofing to finishing touches, contributes to a strong and attractive outcome. This simple guide will assist you in making sure your installation looks nice and protects your home. Remember, accuracy is important for achieving a long-lasting, professional look. Whether you are a beginner or have some experience, good planning and doing it right are essential for success. Your home deserves the best. Choosing concrete siding gives you a strong and stylish upgrade.
Frequently Asked Questions
Can Concrete Siding Be Painted or Stained?
Yes, you can paint or stain fiber cement siding to get the look you want. For the best results, use a good acrylic latex paint or stain that is made for fiber cement. Make sure to use a primer if you need it. This depends on the type of paint you choose and the condition of your siding.
How do I install Hardie Siding (Fiber Cement Siding) to Cement Backer Board?
To install Hardie siding, which is a kind of fiber cement siding, on cement backer board, follow these steps: First, get the area ready. Ensure the backer board is clean and dry. Then, use galvanized nails or screws to attach the siding securely. Lastly, make sure to leave room for expansion.
What are the benefits of concrete siding?
Concrete siding is strong and resists fire. It needs very little upkeep. You don’t have to worry about pests, rot, or moisture damage when you choose it. Plus, concrete siding provides excellent insulation. This keeps your indoor temperature nice and helps lower your energy costs.